
Welcome to our detailed guide on Dynam's latest innovation: the upgraded retractable landing gear system featuring an integrated Gear & LED light Control Unit (GLCU). This advanced system combines landing gear and lighting controls into a single unit, offering enhanced functionality and convenience for RC aircraft enthusiasts. While the wiring process may seem complex at first, this step-by-step guide will walk you through every detail, ensuring a smooth and successful setup.
1. Binding the Receiver
Before diving into the wiring, it's essential to bind the receiver to your transmitter. Here's how:
Step 1: Power on the receiver. If unbound, it will flash a red light rapidly.

Step 2: Press and hold the Bind Button on the receiver. The red light will transition to a slow flash, indicating binding mode.

Step 3: Once successfully bound, the receiver will display a solid green light, confirming the connection.

2. Understanding the GLCU Control Unit
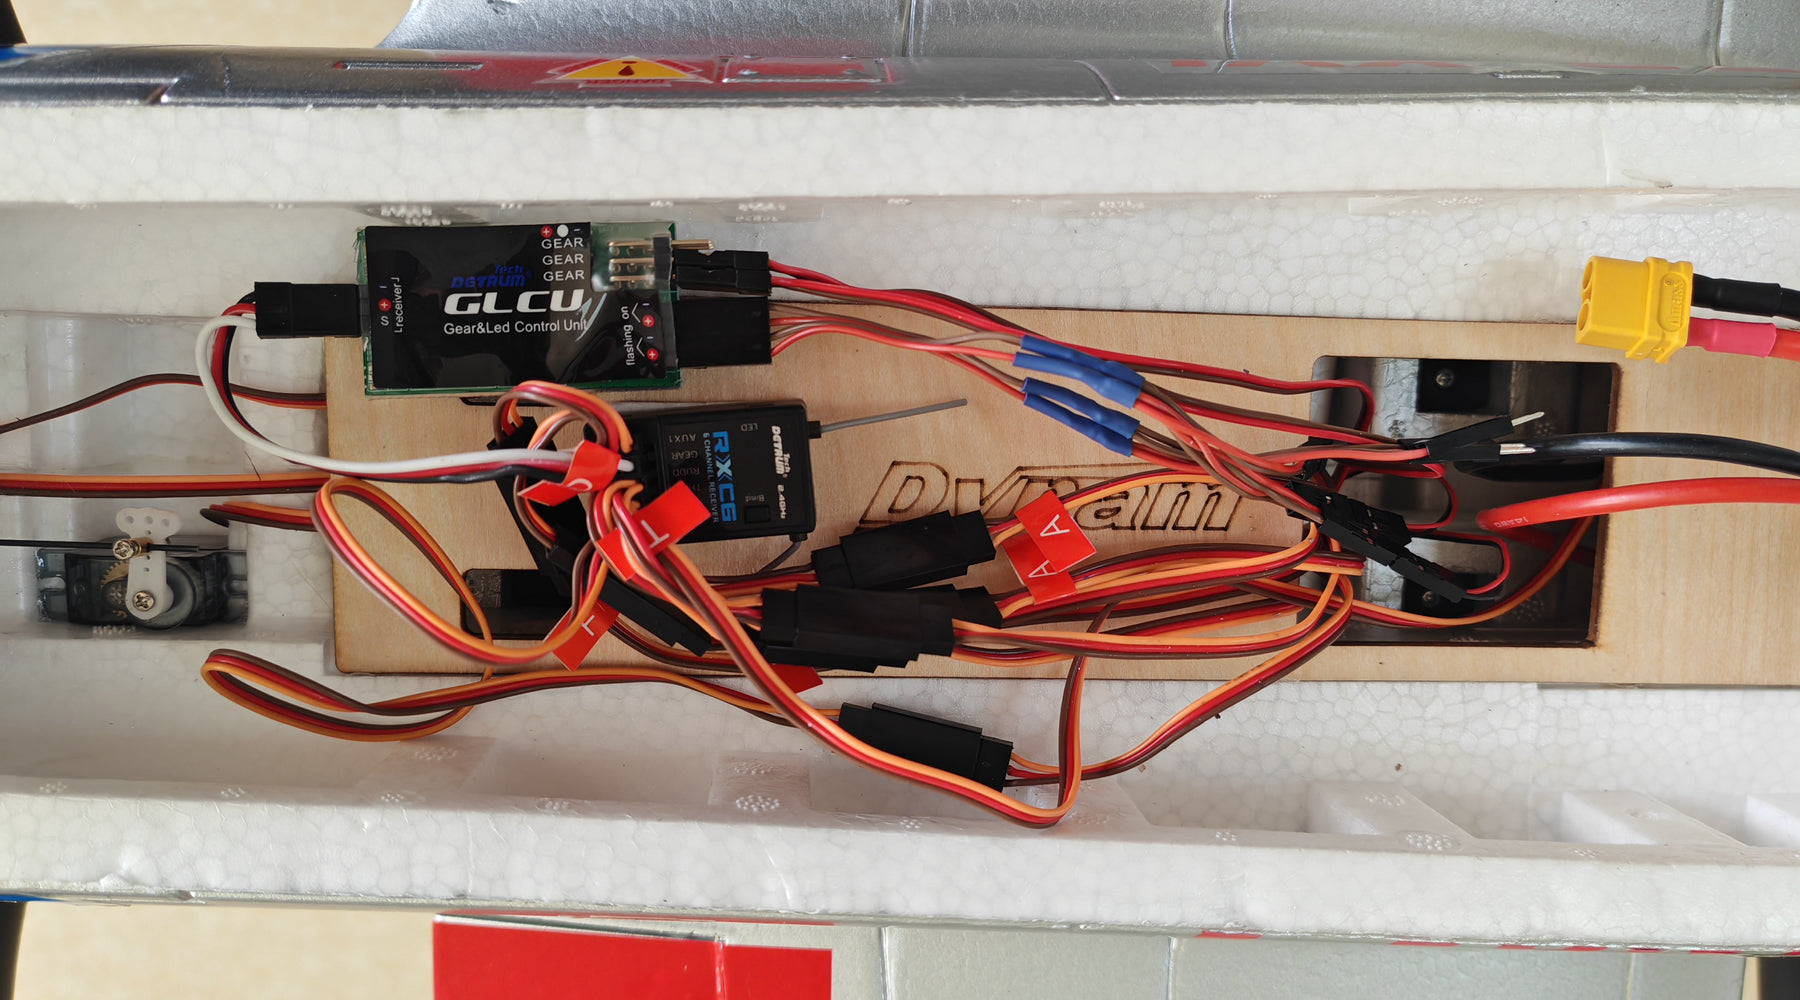
The GLCU is the heart of this system, integrating both retractable landing gear and lighting controls. Here's what you need to know:

LED Extension Cable: This cable comes with 5 wires:
2 wires for flashing lights,
2 wires for steady lights,
1 spare wire for additional customization.

Landing Gear Ports: The GLCU features 3 columns of ports for landing gear connections:
Connect 3 wires if your aircraft has 3 retractable landing gears.
Connect 2 wires if it has 2.

3. Wiring Labels and Connections
To ensure a seamless setup, let's break down the wiring labels and their corresponding connections:
Label A (Aileron): Connects to the AILE port on the receiver.
Label E (Elevator): Connects to the ELEV port.
Label T (Throttle): Connects to the THRO port.
Label R (Rudder): Connects to the RUDD port.
Label G (Gear): Connects to the Gear port for landing gear control.
Label F (Flaps): Connects to AUX1 for flap control.

Additionally, the system includes Y-cables for connecting the rudder, flaps, steering, and ailerons. The LED extension cable connects to the designated port on the GLCU control unit.

4. Step-by-Step Wiring Instructions
Follow these detailed steps to wire your system correctly:
Label A (Aileron):
Use the Y-cable to connect to the AILE port on the receiver. Ensure the orange wire faces upward.
Label E (Elevator):
Connect directly to the ELEV port.
Label T (Throttle):
Connect directly to the THRO port.
Label R (Rudder):
Use the Y-cable to connect to the RUDD port.
GLCU Control Unit Connections:
Label G: Connect to the Gear port on the receiver, with the white wire facing upward.
Landing Gear Wires: Connect to the top-left port on the control unit, ensuring the red wire faces upward.
LED Extension Cable: Connect to the 4-pin port at the bottom-right of the control unit. Use the 2-pin wires to select between steady or flashing light modes based on your preference.
Label F (Flaps):
Use the Y-cable to connect to AUX1 on the receiver.
5. Power-On Check and Lighting Setup
Once all connections are complete, power on the system:
The receiver will flash a red light rapidly. Press and hold the Bind Button to enter slow-flash mode, then bind using your Blitz-DT9 transmitter. A solid green light confirms successful binding.
Testing the Lighting Function:
By default, the lights are set to steady mode. To switch to flashing mode, simply reconnect the LED extension cable to the alternate wires. This flexibility allows you to customize the lighting based on your preferences.
Dynam's upgraded retractable landing gear system with GLCU is a game-changer for RC aircraft enthusiasts, offering a perfect blend of functionality and ease of use. With this comprehensive guide, you're now equipped to wire and configure your system like a pro. Whether you're a beginner or an experienced pilot, this setup ensures a seamless flying experience.
If you have any questions or need further assistance, feel free to contact us. Don't forget to share this guide with fellow RC enthusiasts and stay tuned for more tips and tutorials. Happy flying!